How to setup blocked page?
Print
Modified on: Mon, 12 Nov, 2018 at 2:04 PM
You can make the beautiful blocked page for your blocked visitor. You can display your information on the page.
Start customizing the Blocked Page.
A) Redirect your blocked user on=> Select an option to redirect your visitors.
Blocked Page Settings:-
i) General Settings: -
1) Enter Error Code=> Enter error code which will be displayed to blocked visitors like 402.
2) Enter Title=> Enter the title of the Blocked page.
3) Enter Sub Title: Enter the Sub-Title for the blocked page.
4) Display Background Image=> Select Yes to display image in the background.
5) Upload Background Image=> Upload the image which will be displayed in the background.
6) Background Repeat=> Select an option for background image.
7) Click on Save Options button.
8) Select A Template

ii) Font & Style Settings:-
1) Page Background Color Option=> Select blocked page background color.
2) Error Code Color=> Choose error code color
3) Error Code Font Size=> Select a font size for error code
4) Error Code Font Family=> Select font family for error code
5) Error Code Font Style=> Select font style for error code
6) Title Color=> Select blocked page Title color
7) Title Font Size=> Select a font size for page Title
8) Title Font Family=> Select font family for page Title
9) Title Font Style=> Select font style for page Title
10) Sub Title Color=> Select blocked page Sub Title color
11) Sub Title Font Size=> Select a font size for page Sub Title
12) Sub Title Font Family=> Select font family for page Sub Title
13) Sub Title Font Style=> Select font style for page Sub Title
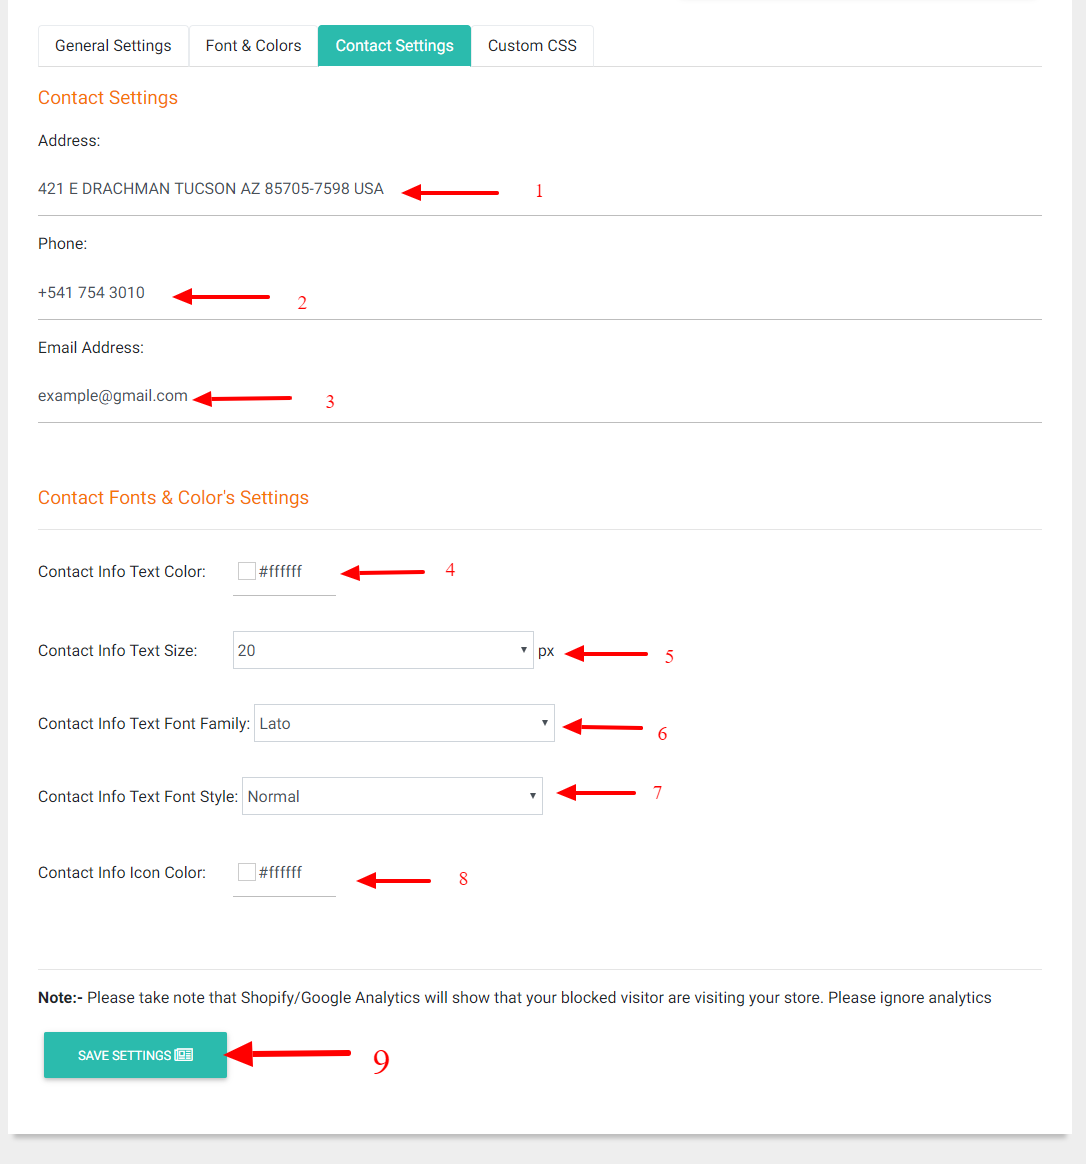
14) Contact Info Text Color=> Select blocked page Contact Info Text color
15) Contact Info Text Font Size=> Select a font size for page Contact Info Text
16) Contact Info Text Font Family=> Select font family for Contact Info Text
17) Contact Info Text Font Style=> Select font style for Contact Info Text
18) Contact Info Icon Color=> Select color for Contact Info Text
19) Click on Save Options button.

Contact Settings:-
1) Address=> Enter your Address
2) Phone=> Enter your phone number
3) Email Address=> Enter your Email Address
4) Click on Save Options button
Custom CSS:
1) Custom CSS=> Enter your Custom CSS here
2) Click on Save & Publish Options button

Now Your Blocked page has been completed.
Did you find it helpful?
Yes
No
Send feedback Sorry we couldn't be helpful. Help us improve this article with your feedback.