
The Shifts module allows you to create different time slots for your library. These shifts can later be assigned to students during seat booking.
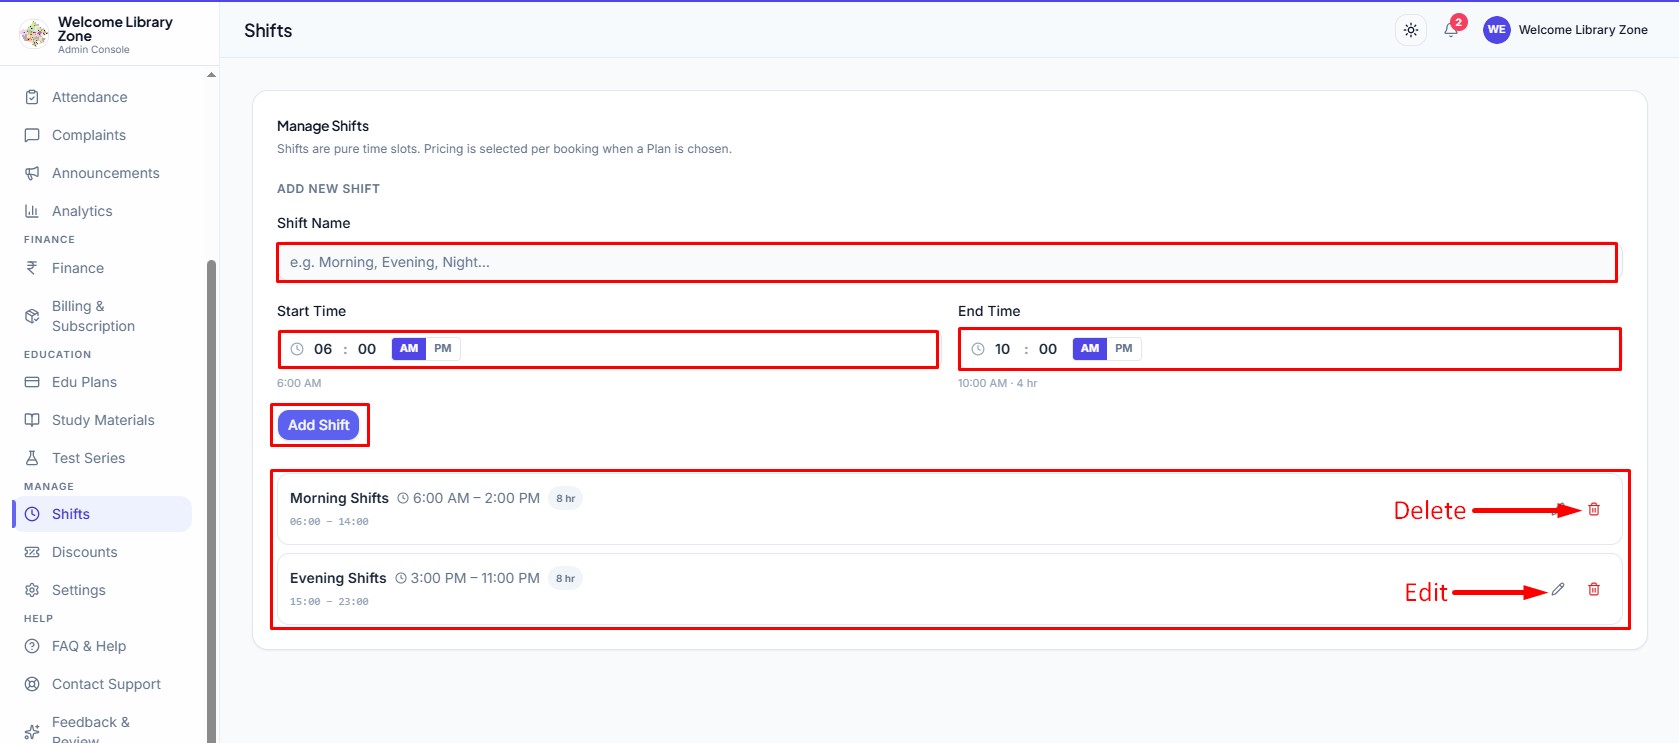
Step 1: Open the Shifts Menu Section
- Log in to your Welcome Library Zone dashboard.
- From the left sidebar, click Shifts.
- You will see the Manage Shifts page.
Step 2: Enter the Shift Name
- In the Shift Name field, enter a descriptive name for the shift.
- Tip: Choose names that are easy for students and staff to understand.
Step 3: Select the Start Time
- Choose the time when the shift begins.
Step 4: Select the End Time
- Choose the time when the shift ends.
- The system will automatically calculate the total duration of the shift.
Step 5: Click "Add Shift"
- After entering all the required information, click the Add Shift button.
- The new shift will immediately appear in the list below.
- All created shifts are displayed in the lower section.
- To modify an existing shift:
- Click the Edit icon.
- Update the shift details.
- Save the changes.
- To remove a shift:
- Click the Delete icon.
- Confirm the deletion.
Note:- A shift cannot be deleted if it is currently assigned to active student bookings.