
Adding a new student is quick and simple. Follow the steps below to create a booking and assign a seat to the student.
Step 1: Open Student Bookings
- From the left-side navigation menu, click Student Bookings.
- This page displays all existing bookings and allows you to create new ones.
Step 2: Click New Booking
- Click the New Booking button to open the booking panel.
- This panel contains all the information required to register a new student.
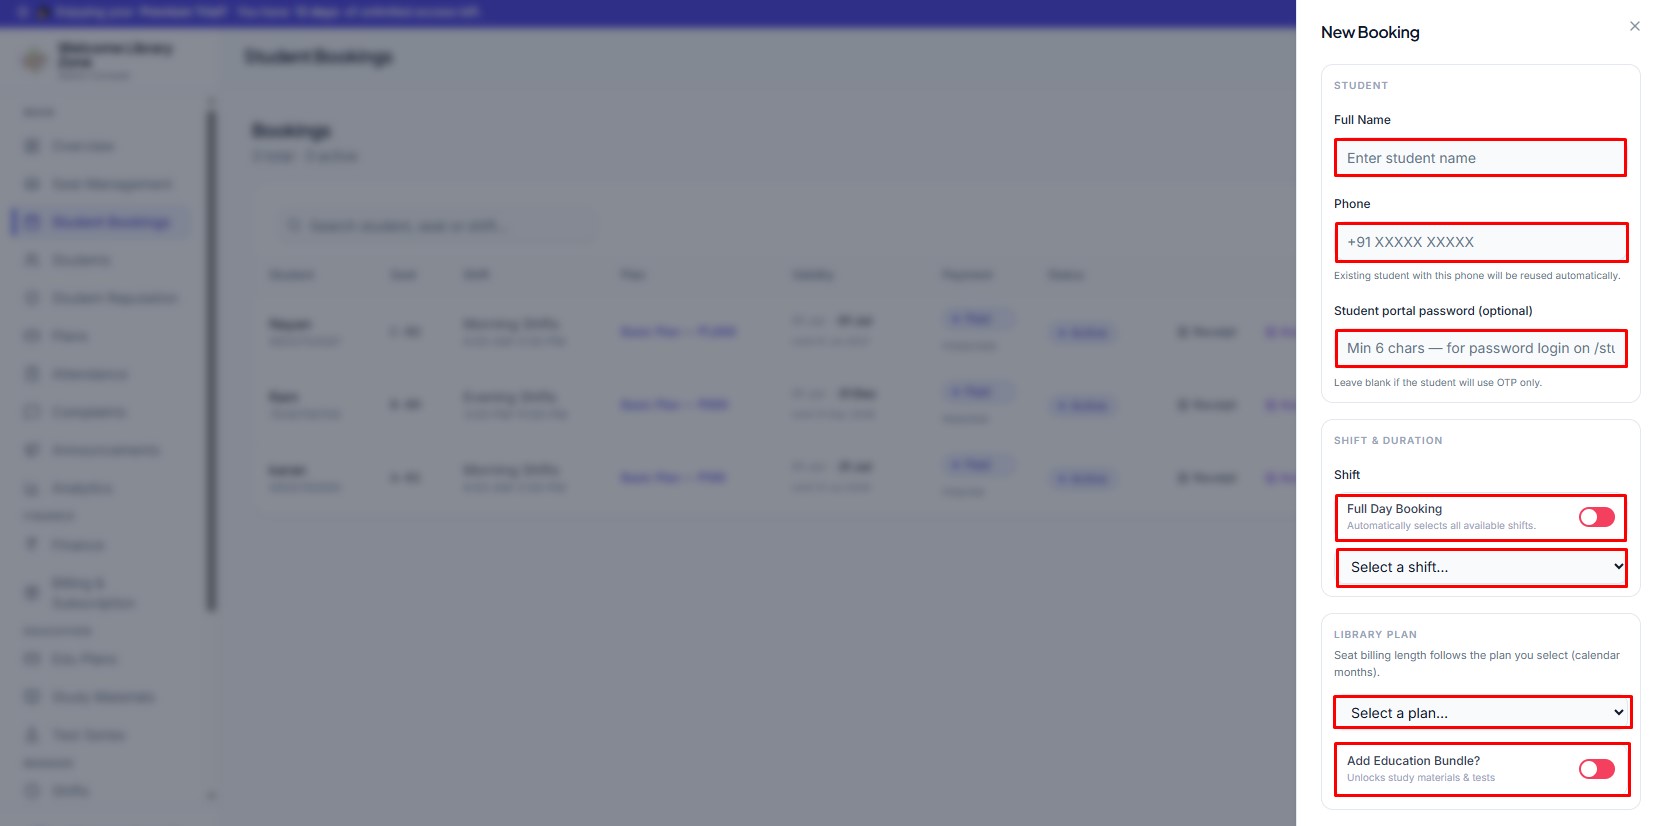
Step 3: Enter Student Information
- Full Name – Enter the student's complete name.
- Phone Number – Provide a valid mobile number. If the phone number already exists, the system will automatically use the existing student profile.
- Student Portal Password (Optional) – Set a password if the student will log in using a password. Leave this field blank if the student will use OTP login.
Step 4: Select Shift & Duration
- Choose how the student will attend the library.
- Enable Full Day Booking if the student requires access to all available shifts. Otherwise, select the desired Shift from the dropdown list.
Step 5: Choose a Library Plan
- Select the appropriate membership plan for the student. The selected plan determines:-
- Membership duration
- Pricing
- Validity period
- If your library offers educational resources, you can also enable the Education Bundle to provide study materials and test series.
Step 6: Select a Seat
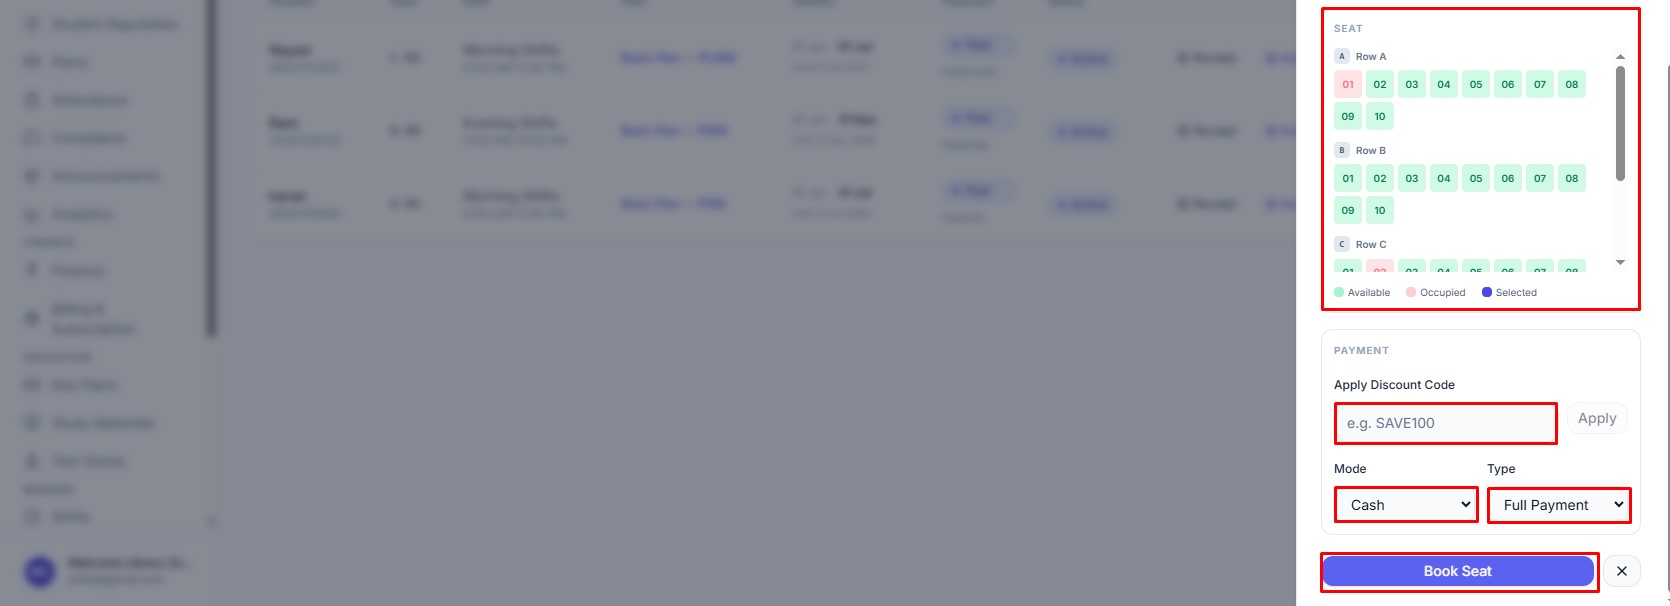
- After selecting the shift, the system will display all available seats.
- Simply choose an available seat to assign it to the student.
Step 7: Enter Payment Details
- Complete the payment information before confirming the booking.
- Apply a Discount Code (if available).
- Select the preferred Payment Mode (Cash, UPI, Online, etc.).
- Choose the Payment Type (Full Payment, Partial Payment, etc.).
Step 8: Complete the Booking
- Once all the required information has been entered, click the Book Seat button.
Your student is now successfully registered and ready to use the library.