
The Seat Management module allows you to create, organize, and manage your library seating arrangement. You can divide seats into sections (such as Rows, Floors, or Halls), specify the number of seats in each section, and monitor seat availability in real time.
Step 1: Open Seat Management
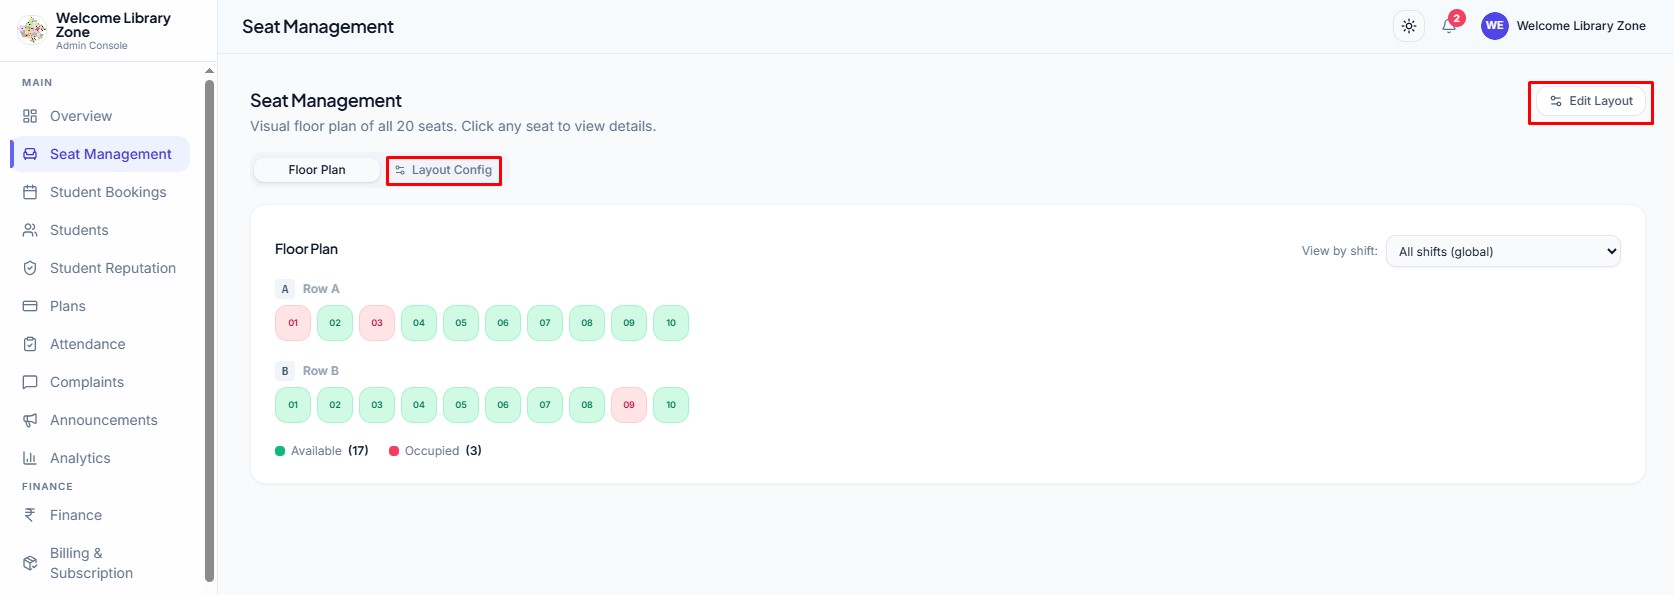
- Navigate to Seat Management from the left sidebar.
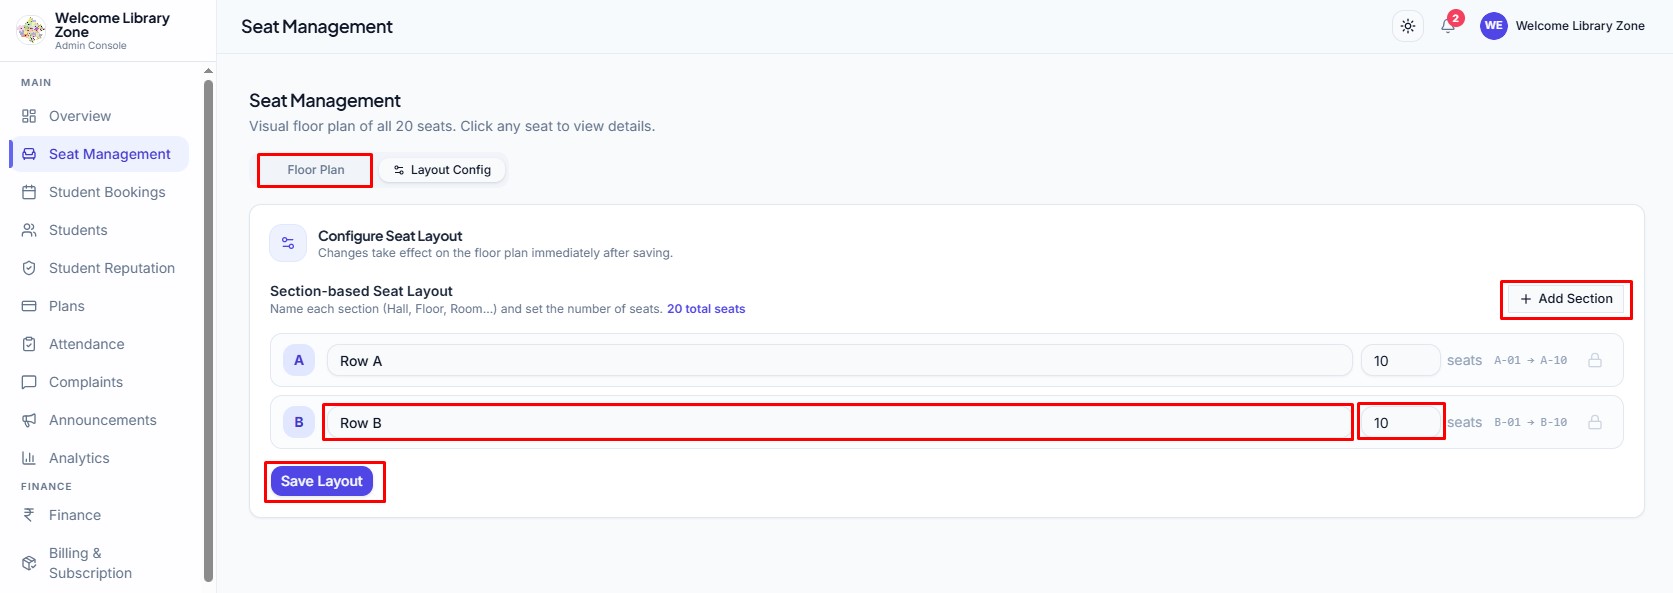
- Select the Layout Config tab.
- Here you can create and customize the seating structure for your library.
Step 2: Create or Edit Sections
- Each section represents a group of seats.
- For each section you can:-
- Rename the section.
- Modify the number of seats.
- View the seat numbering automatically generated by the system.
Step 3: Add a New Section
- Click the Add Section button to create another seating area.
- After creating the section:-
- Enter the section name.
- Specify the number of seats.
- The system will automatically generate seat numbers for that section.
Step 4: Save the Layout
- Once all sections and seat counts have been configured, click Save Layout.
- Your seating arrangement will immediately become available throughout the application.
Step 5: View seats availability
- Switch to the Floor Plan tab to see a live visual representation of all library seats.
- The floor plan displays every section along with its seat numbers and current status.
- Seat Status Colors:-
- Green – Available (The seat is vacant and can be assigned to a student.)
- Red – Occupied (The seat is currently assigned to an active student.)