
Follow these simple steps to allow specific IPv4 addresses to bypass all blocking rules and access your store.
Step 1: Open the IPv4 Whitelist Section
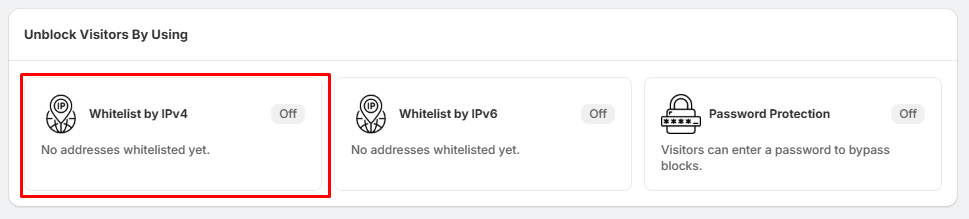
- Go to Whitelist Settings.
- Locate the Whitelist IPv4 section.
- Click Manage Addresses.
This will open the Whitelist IPv4 IPs page.
Step 2: Add a New IPv4 Address
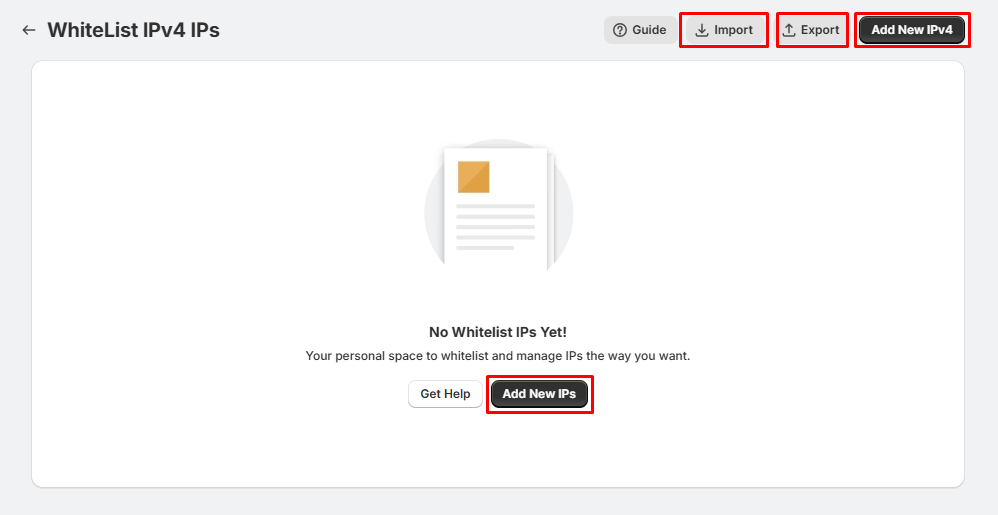
On the Whitelist IPv4 IPs page, you can add a new IP address in either of these ways:
- Click Add New IPv4 in the top-right corner.
- Or click the Add New IPs button displayed in the center of the page.
Step 3: Enter the IPv4 Address
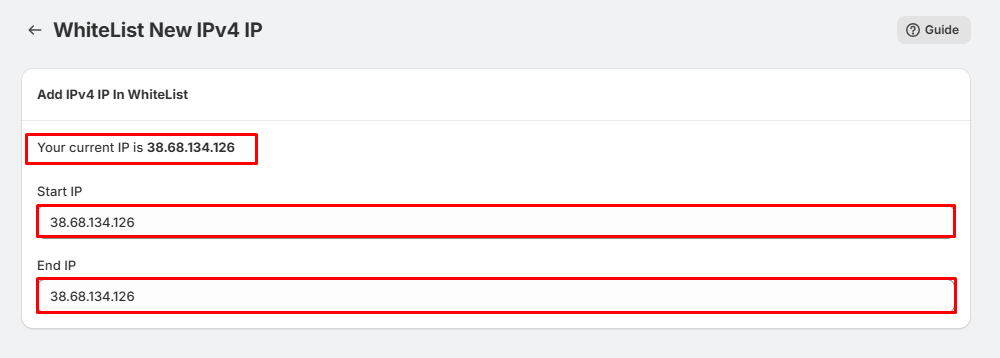
On the Whitelist New IPv4 IP page:
- Your current public IPv4 address is displayed at the top for reference.
- Example: Your current IP is 38.68.134.126
- To whitelist a single IP address, enter the same IP in both the Start IP and End IP fields.
- To whitelist an IP range, enter the first IP in Start IP and the last IP in End IP.
Single IP Example:
- Start IP : 38.68.134.128
- End IP : 38.68.134.128
IP Range Example:
- Start IP : 38.68.134.1
- End IP : 38.68.134.255
Step 4: Save the Rule
- After entering the IP address or IP range, click Save.
- The specified IPv4 address(es) will now be added to the whitelist and will bypass all active blocking rules.
Import IPv4 Addresses
To whitelist multiple IPv4 addresses at once:
- Click Import.
- Upload your supported file containing IPv4 addresses.
- Complete the import process.
This is useful when adding a large number of trusted IP addresses.
Export IPv4 Addresses
To download your current whitelist:
- Click Export.
- A file containing all whitelisted IPv4 addresses will be downloaded.
This can be used for backup or migration purposes.
Tips:
- Use the same IP in both fields to whitelist a single address.
- Use Start IP and End IP to whitelist an entire IP range.
- Only whitelist trusted IP addresses.
- Devices or users on the whitelist will bypass all active blocking rules, including country, state, bot, and VPN restrictions.
- Regularly export your whitelist to keep a backup of your trusted IP addresses.