
Follow these simple steps to allow a specific IPv6 address to access your store, even if blocking rules are enabled.
Step 1: Open the WhiteList IPv6 Section
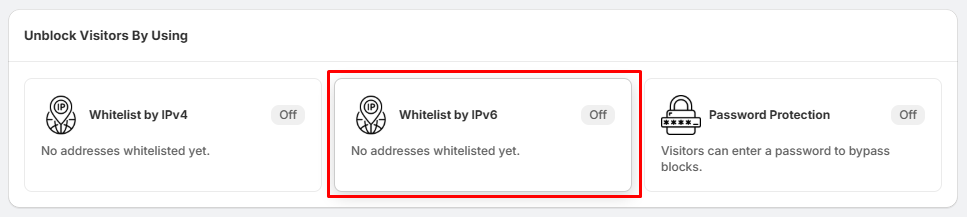
- Go to WhiteList Settings.
- Locate the WhiteList IPv6 section.
- Click Manage Addresses.
This will open the WhiteList IPv6 IPs page.
Step 2: Add a New IPv6 Address
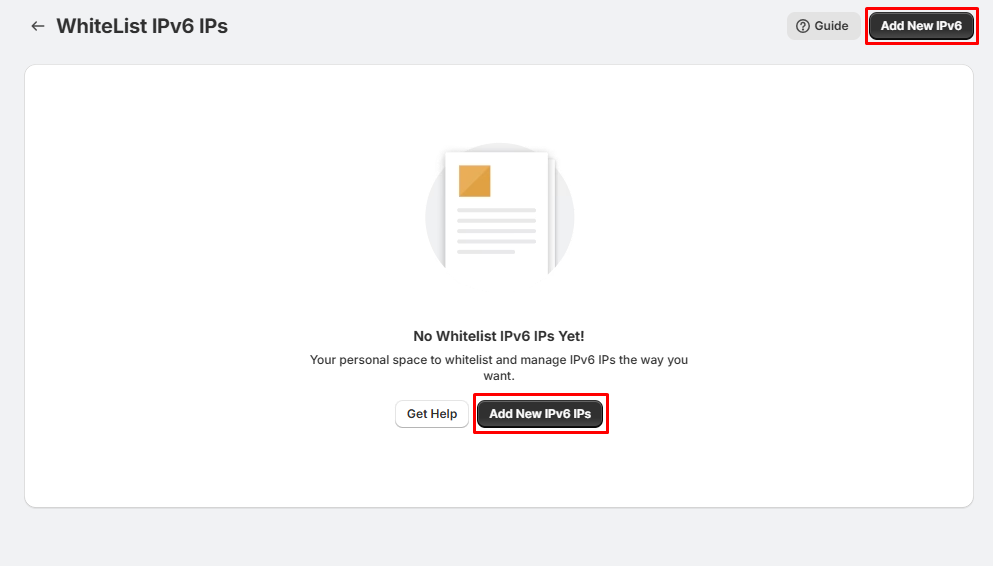
On the WhiteList IPv6 IPs page, you can add a new IPv6 address in either of these ways:
- Click Add New IPv6 in the top-right corner.
- Or click the Add New IPv6 IPs button displayed in the center of the page.
Step 3: Enter the IPv6 Address
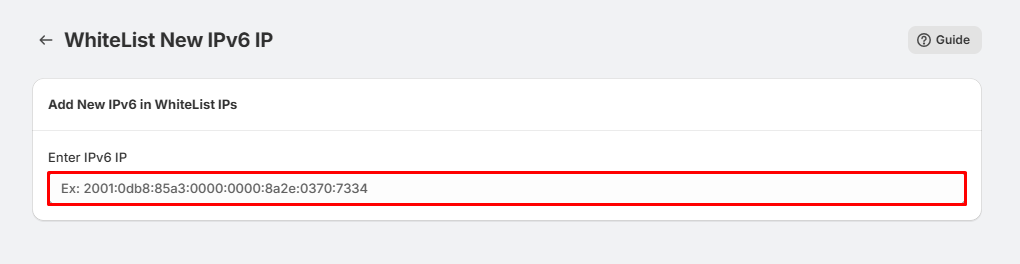
On the WhiteList New IPv6 IP page:
- Enter the complete IPv6 address that you want to whitelist.
- Example: 2001:0db8:85a3:0000:0000:8a2e:0370:7334
- Make sure the IPv6 address is entered in the correct format before saving.
Step 4: Save the WhiteList Rule
After entering the IPv6 address,
- click Save.
The IPv6 address will be added to your whitelist, and visitors using that address will always be allowed to access your store, even if blocking rules are enabled.
Tips:
- Enter the complete IPv6 address in the correct format.
- Double-check the address before saving to avoid allowing an incorrect IP.
- If you need to whitelist multiple IPv6 addresses, repeat the process for each address.
- You can remove whitelisted IPv6 addresses at any time from the WhiteList IPv6 IPs page.
- Test the rule after saving to ensure the IPv6 address is allowed to access your store as expected.