
The Settings page allows you to configure how withdrawal requests are processed, automate order actions, manage data retention, and customize the withdrawal experience for your customers.
Step 1: Open the Settings Page
From the Local EU Withdrawal app dashboard:
- Click Settings from the left navigation menu.
- The Settings page will open, where you can configure all withdrawal-related options.
Step 2: Configure Withdrawal Rules
The Withdrawal Rules section controls when customers are eligible to submit withdrawal requests.
Configure the following options:
- Withdrawal Period (days) – Enter the number of days customers have to submit a withdrawal request after their order has been fulfilled.
- Grace Period (days) – Add extra days after the withdrawal period before requests are rejected.
- Auto-create Shopify Returns – Automatically create a Shopify return when a withdrawal request is approved.
- Allow Verified Orders Only – Only accept withdrawal requests when the order number and email match an existing Shopify order.
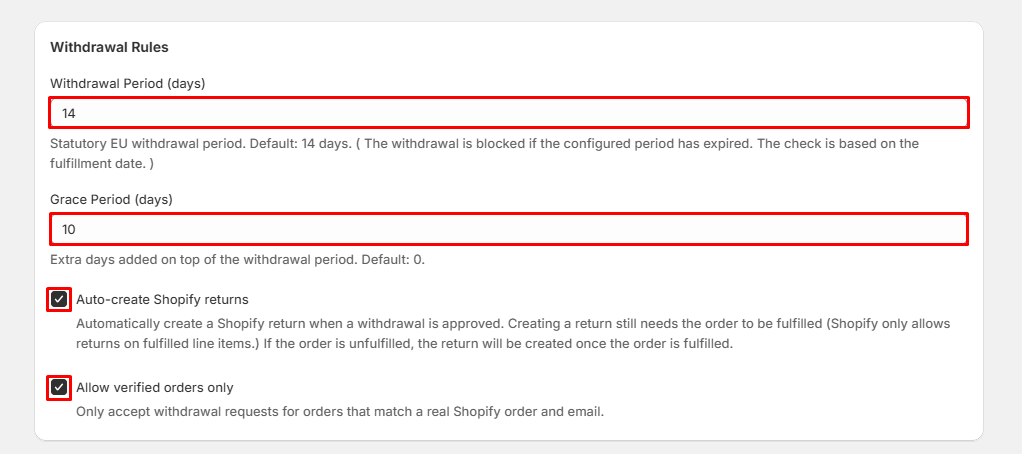
Note: Shopify returns can only be created for fulfilled orders. If the order has not yet been fulfilled, the return will be created automatically after fulfillment.
Step 3: Enable Automatic Order Tagging
The Automatic Order Tagging section helps you identify withdrawal requests directly within Shopify.
Configure the following:
- Enable Automatic Order Tagging.
- Enter the tag name that should be added to verified withdrawal orders.
- Example: EU Withdrawal
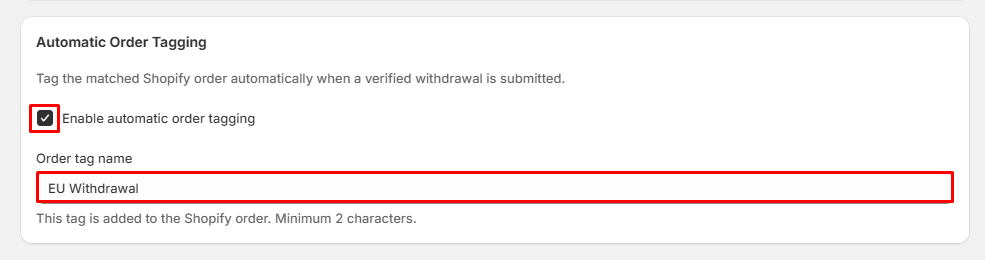
The selected tag will automatically be added to matching Shopify orders.
Step 4: Configure Automatic Actions for Unfulfilled Orders
If a customer submits a withdrawal request before the order has been shipped, the app can automatically perform an action.
Enable Automatic action on unfulfilled orders, then choose one of the following:
- Do Nothing – No changes are made to the order.
- Put Order on Hold – Places the order on hold until it is reviewed.
- Cancel Order – Automatically cancels the order.
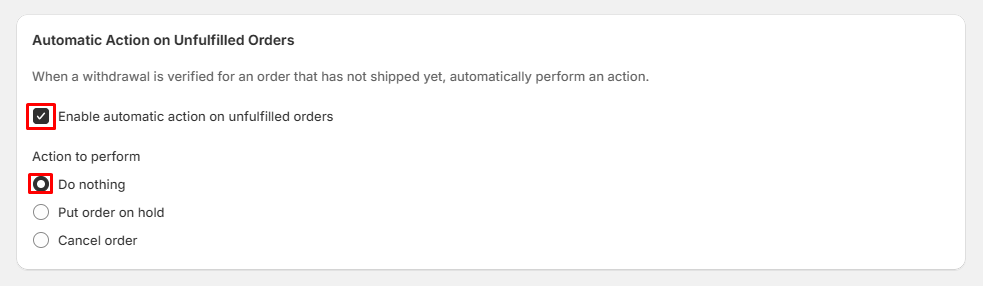
Choose the option that best matches your store's workflow.
Step 5: Configure Privacy Settings
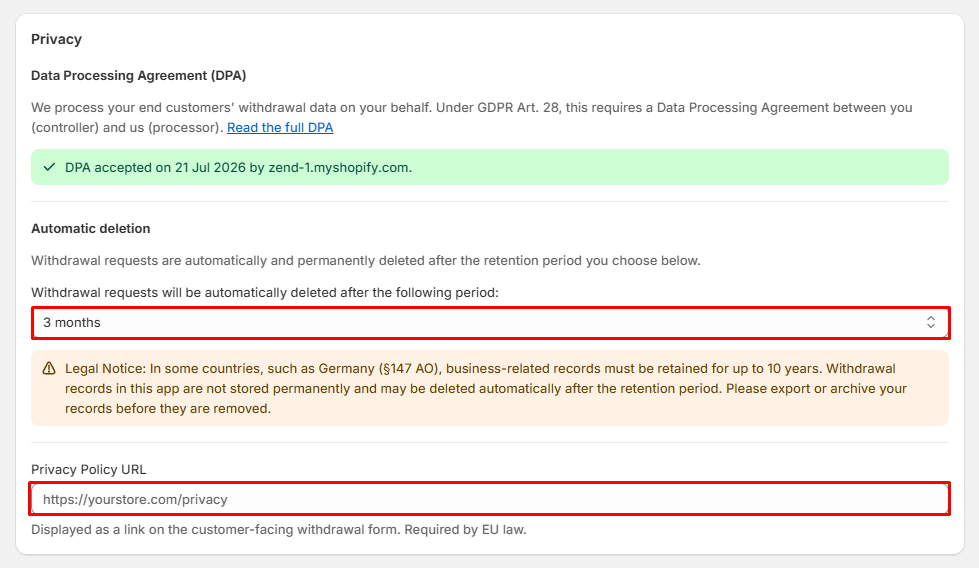
Data Processing Agreement (DPA)
- The app processes customer withdrawal data on your behalf. Before using the app, you should accept the Data Processing Agreement (DPA).
Automatic Deletion
- Select how long withdrawal requests should be retained before they are permanently deleted.
- Examples include: 3 months / 6 months / 12 months
Important: Some countries require business records to be retained for several years. Be sure to export or archive your records before they are automatically deleted if required by your local regulations.
Privacy Policy URL
- Enter your store's Privacy Policy URL.
- This link will be displayed on the customer withdrawal form as required under EU consumer protection laws.
- Example: https://yourstore.com/privacy
Step 6: Customize the Withdrawal Form (Optional)
The Advanced section allows you to add custom CSS to match the withdrawal form with your store's branding.
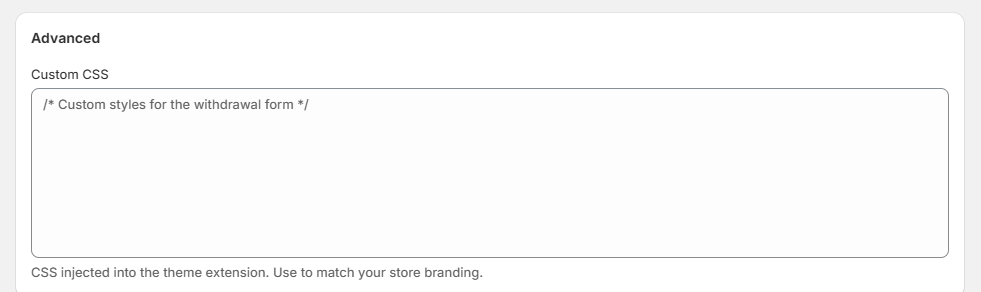
You can customize elements such as:
- Colors
- Fonts
- Buttons
- Layout
- Spacing
- Borders
Only enter valid CSS code in this section.
Step 7: Save Your Changes
After configuring your settings:
- Review all changes.
- Click Save in the top.
- Wait for Shopify to confirm that your settings have been saved successfully.
Your withdrawal settings are now active.
Tips:
- Configure the withdrawal period according to your country's legal requirements.
- Enable automatic order tagging to easily identify withdrawal requests in Shopify.
- Choose automatic actions carefully to avoid unintended order cancellations.
- Enter a valid Privacy Policy URL to comply with GDPR requirements.
- If you use Custom CSS, preview the withdrawal form to ensure it matches your store's design.
- Review your data retention period regularly to ensure compliance with local record-keeping laws.