
The Withdrawals section allows you to view, review, approve, reject, and manage all withdrawal requests submitted by your customers.
Step 1: Open the Withdrawals Page
From the Local EU Withdrawal app dashboard, click Withdrawals from the left sidebar.
You'll see an overview of all customer withdrawal requests.
You'll also find the withdrawal list where each request displays:
- Customer information
- Order number
- Current status
- Verification status
- Withdrawal period status
- Created date
- Details button
- Delete button
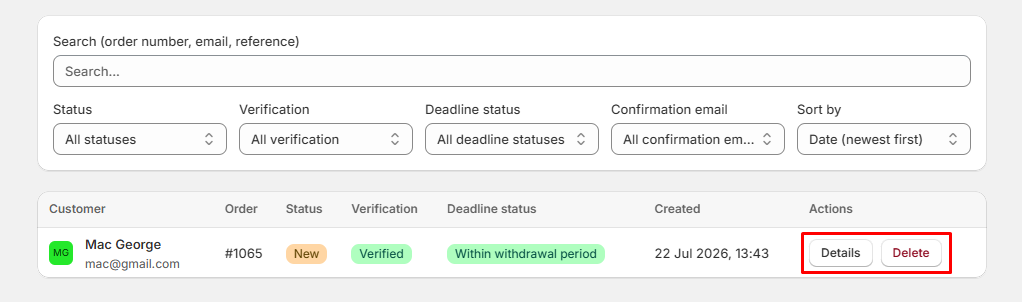
Tip: Use the search and filters to quickly locate specific withdrawal requests.
Step 2: Open Withdrawal Details
- Click the Details button beside any withdrawal request.
- This opens the complete withdrawal information page.
Step 3: Review the Withdrawal Request
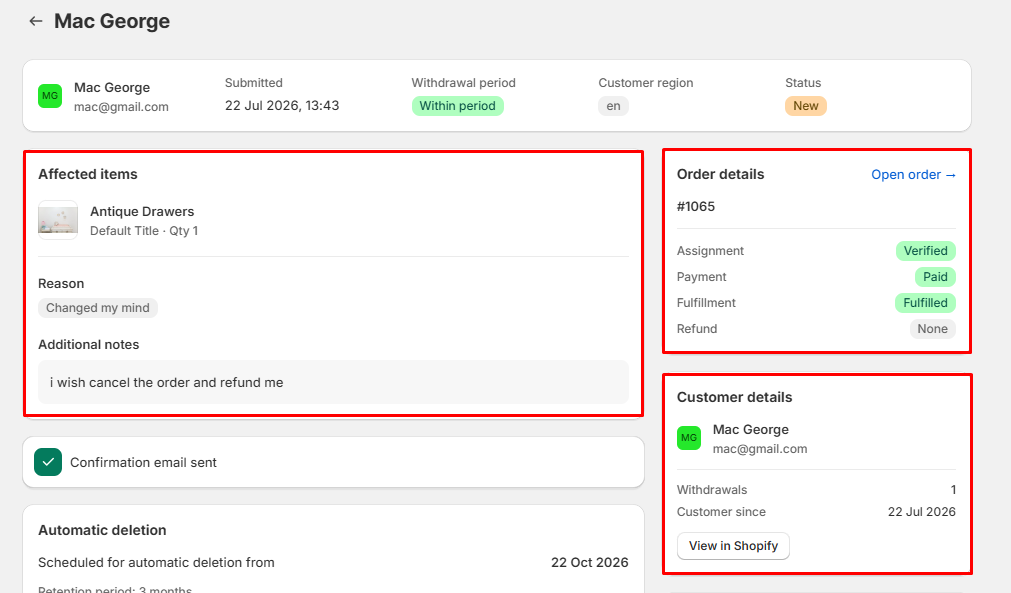
Inside the details page you can review:
Customer Information
- Customer name
- Email address
- Customer region
Order Information
- Order number
- Payment status
- Fulfillment status
- Refund status
- Assignment status
Withdrawal Information
- Submitted date
- Withdrawal period status
- Reason for withdrawal
- Additional notes left by the customer
Affected Products
- View every product included in the withdrawal request along with quantity and product details.
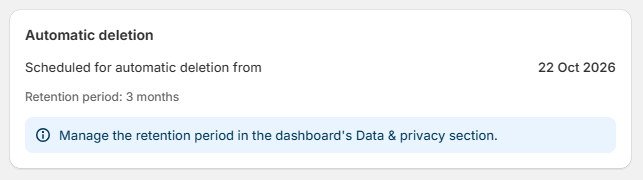
Step 4: Check Automatic Deletion
The Automatic Deletion section shows:
- Scheduled deletion date
- Current retention period
You can change the retention period anytime from:
- Settings → Privacy → Automatic Deletion
Step 5: Review Withdrawal History
The Withdrawal Log records every action taken on the request, including:
- Withdrawal created
- Confirmation emails sent
- Status updates
- Approval or rejection
- System activities
- Date and time of each event
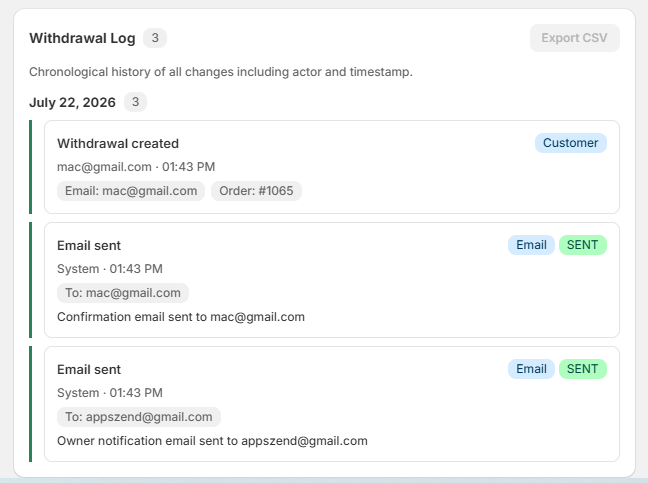
This provides a complete audit trail for every withdrawal.
Step 6: Approve or Reject the Request
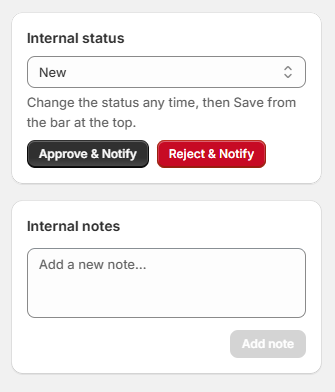
From the Internal Status section you can:
- Change the withdrawal status.
- Click Approve & Notify to approve the request and automatically notify the customer.
- Click Reject & Notify to reject the request and send a rejection email.
Note: Customers are automatically notified by email after approval or rejection.
Use the Internal Notes section to add private notes for your team.
These notes:
- Are visible only to store staff.
- Are not shared with customers.
Step 7: Delete a Withdrawal (Optional)
If a withdrawal request is no longer required:
- Return to the Withdrawals page.
- Click Delete beside the request.
- Confirm the deletion.

Warning: Deleted withdrawal requests cannot be recovered.
Export Withdrawal Data
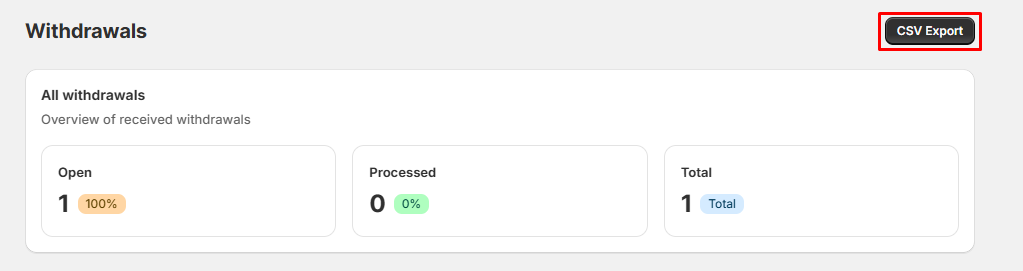
- Click the CSV Export button at the top of the Withdrawals page to download all withdrawal records for reporting or backup purposes.
Tips:
- Review each withdrawal carefully before approving or rejecting it.
- Use internal notes to keep track of communication with customers.
- Export withdrawal data regularly for record keeping.
- Check the withdrawal log whenever you need to review previous actions or email history.