
Adding a consultant allows them to receive chat, voice, and video consultation requests from customers. Follow the steps below to create a new consultant profile.
Step 1: Open Consultant List
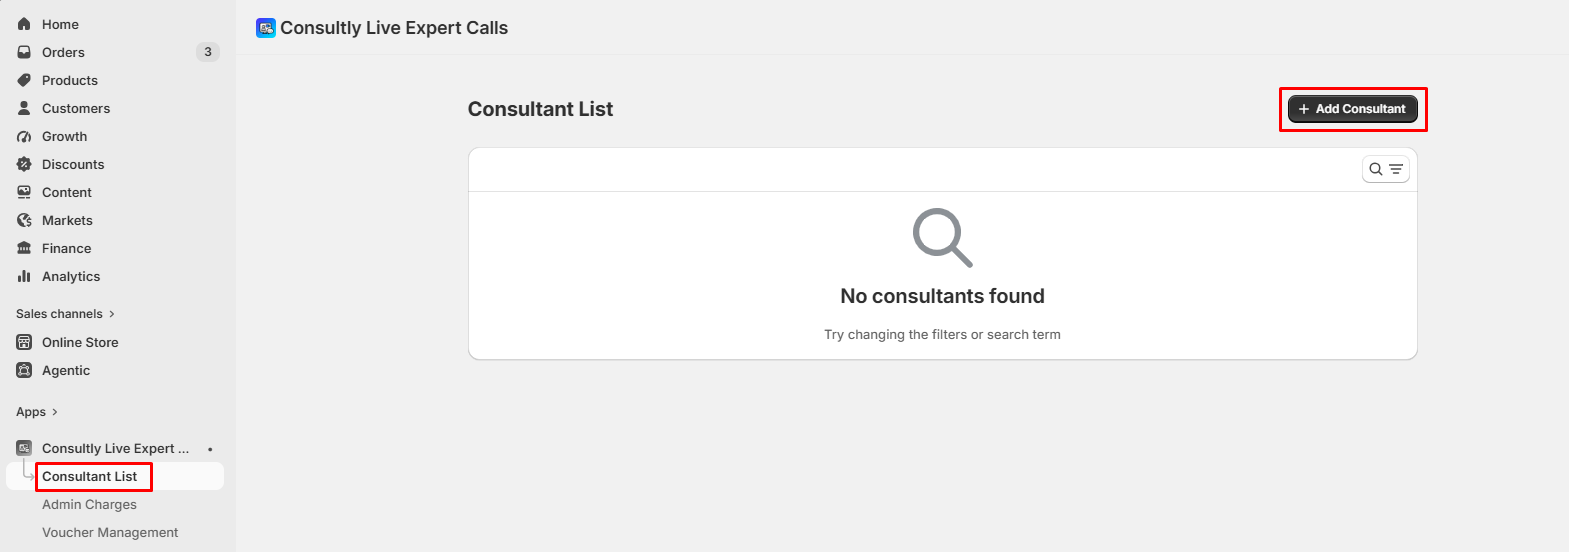
- From the Consultly Live Expert Calls dashboard.
- Navigate to Consultant List and click Add Consultant.
- You'll be taken to the Add Consultant Settings page.
Step 2: Enter Basic Consultant Information
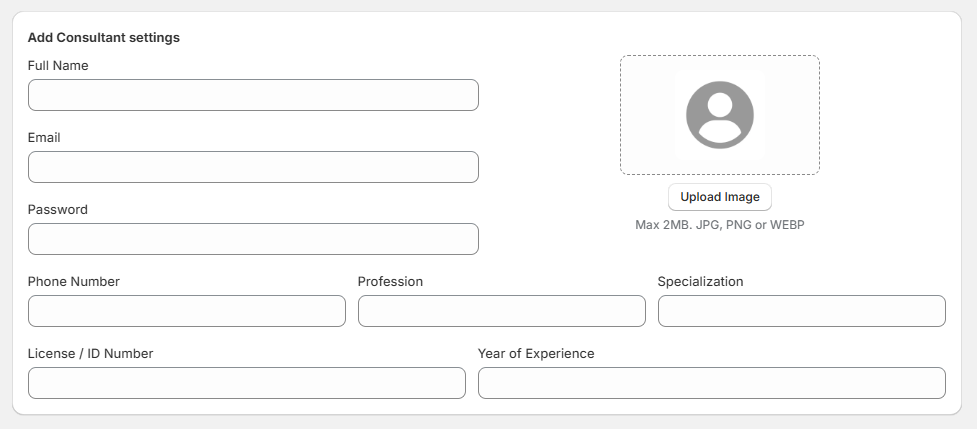
Fill in the consultant's basic details.
Required Information
- Full Name – Enter the consultant's full name.
- Email – Enter a unique email address.
- Password – Create a secure login password.
- Phone Number – Enter the consultant's contact number.
- Profession – Example: Doctor, Lawyer, Financial Advisor, Teacher.
- Specialization – Consultant's area of expertise.
- License / ID Number – Professional license or identification number (if applicable).
- Year of Experience – Total years of professional experience.
- Upload Profile Image -
Click Upload Image to add the consultant's profile picture.
Supported formats:
1. JPG
2. PNG
3. WEBP
Maximum file size: 2 MB
Note: A professional profile image helps customers recognize and trust the consultant.
Step 3: Configure Consultation Charges
Set the consultant's pricing for each consultation method.
Available pricing options:
- Chat per minute
- Voice per minute
- Video per minute
Enter the amount that customers will be charged per minute.
Example:
- Chat: $1.00/min
- Voice: $2.00/min
- Video: $3.00/min

Step 4: Add Languages or Tags
Under Tags, enter the languages that describe the consultant.
Examples:
- English
- Hindi
- Spanish
These tags help customers find consultants more easily.

Step 5: Enter Consultant Personal Details
Complete the remaining consultant information.
Fill in:
- Display Name
- Gender
- House Number
- Street Area
- Landmark
- Address
- Pincode
- Date of Birth
- PAN Card Number
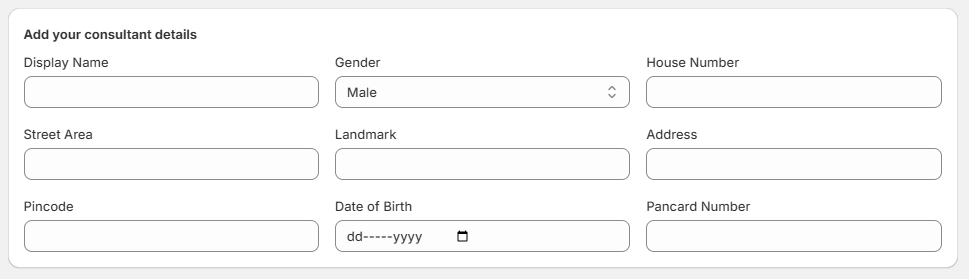
Note: Personal details help maintain complete consultant records within the app.
Step 6: Submit the Consultant
After reviewing all information:
- Verify that all required fields are completed.
- Click Submit.
The consultant will be added successfully and will appear in the Consultant List.
Tips:
- Use a unique email address for every consultant.
- Upload a clear, professional profile picture.
- Double-check consultation charges before submitting.
- Add relevant languages and tags to improve consultant discoverability.
- Ensure all required fields are completed before clicking Submit.