Here is the complete, comprehensive guide combining all your configuration steps into settings tutorial for CoursesKart Setttings.
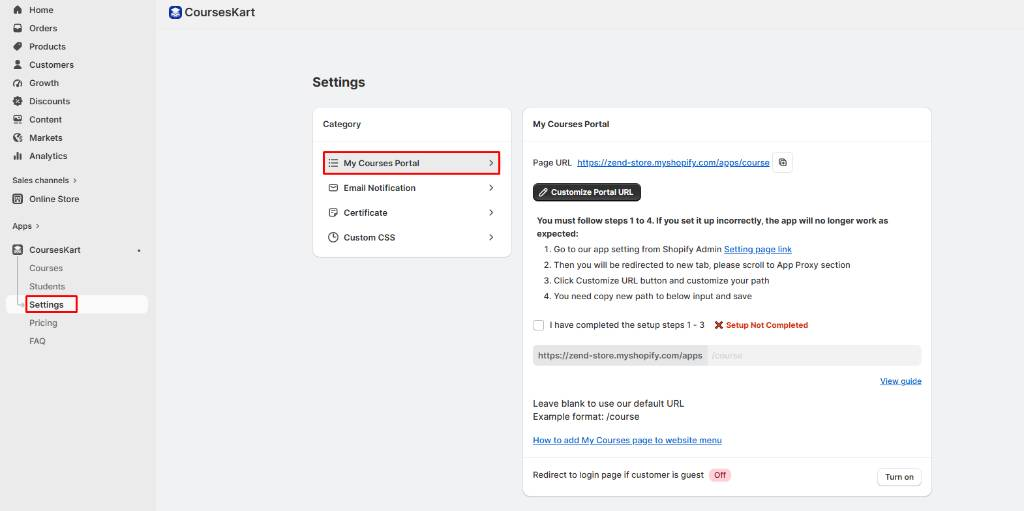
Step 1: Open the Settings Page
- Navigate to your dashboard side menu on the left.
- Look under the Apps section and select CoursesKart.
- Click on Settings to open the main configuration dashboard.
Step 2: Configure Your Student Portal (My Courses Portal)
1. Select My Courses Portal from the Category list.
2. Connect App Proxy: Follow these steps to map the portal correctly to your Shopify store:
- Click the blue Setting page link to open your Shopify Admin app configuration in a new browser tab.
- Scroll down to the App Proxy section.
- Click Customize URL and choose your desired path prefix (for example: /course).
- Copy your new path prefix, return to CoursesKart, and paste it into the URL field.
- Check the box that says "I have completed the setup steps 1 - 3" to clear the setup alert.
3. Guest Access Control: Go to the bottom right and click the Turn on button next to "Redirect to login page if customer is guest" if you want to require users to log in before seeing course pages.
Step 3: Connect Your Custom Mail Server (Email Notification)
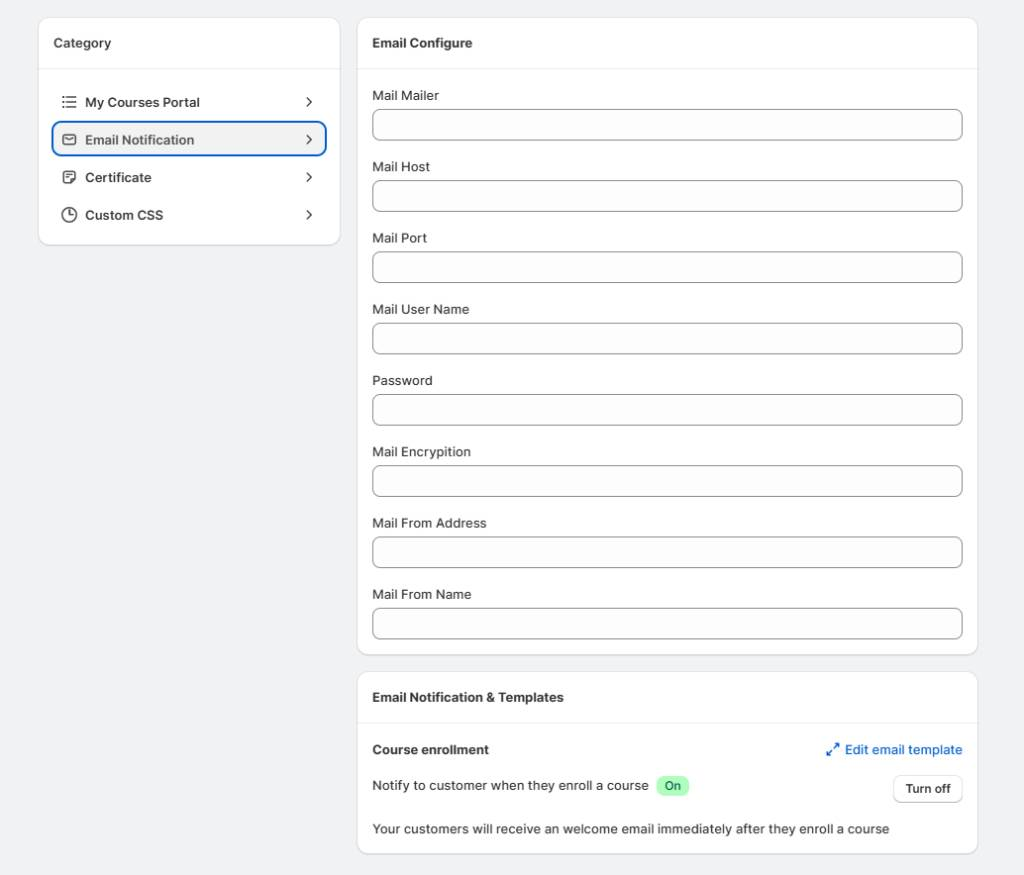
1. Select Email Notification from the Category list.
2. Fill Server Details: In the Email Configure section, input your server credentials to send emails from your own domain:
- Mail Mailer: Your mail transmission protocol (such as smtp).
- Mail Host: Your provider's endpoint domain (such as ://gmail.com).
- Mail Port: Your transmission port (typically 465 for SSL or 587 for TLS).
- Mail Username: Your complete sender account email address.
- Password: Your login password or app-specific password.
- Mail Encryption: Your choice of security socket layer (ssl or tls).
- Mail From Address: The public-facing email address students will see.
- Mail From Name: Your business name or personal brand name.
3. Toggle Automation: Scroll down to Email Notification & Templates. Ensure Course enrollment is set to On so students automatically get welcome emails. Click Edit email template to rewrite the message body.
Step 4: Setup Student Rewards (Certificate)
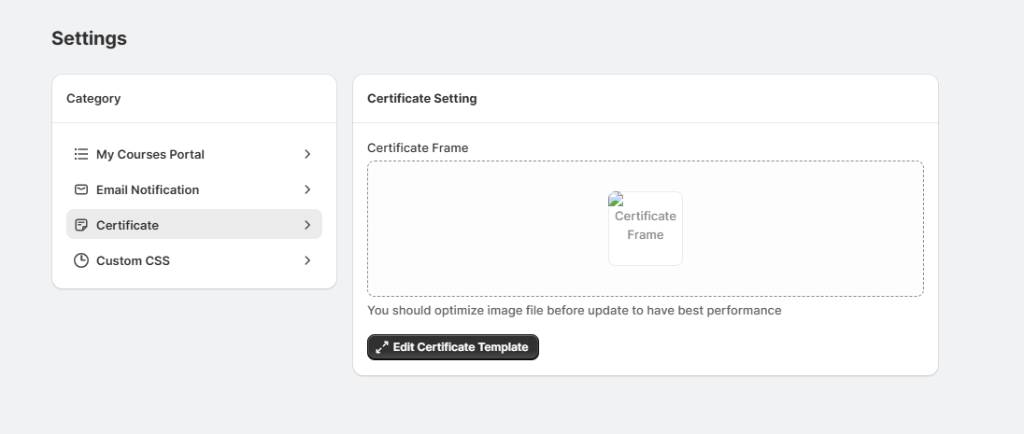
- Select Certificate from the Category list.
- Background Setup: Find the Certificate Frame zone.
- Performance Tip: Always compress and optimize your custom graphic files before uploading them so your user dashboard loads fast.
- Layout Design: Click the black Edit Certificate Template button to launch the visual placement editor. This allows you to position name dynamic placeholders onto your frame backdrop.
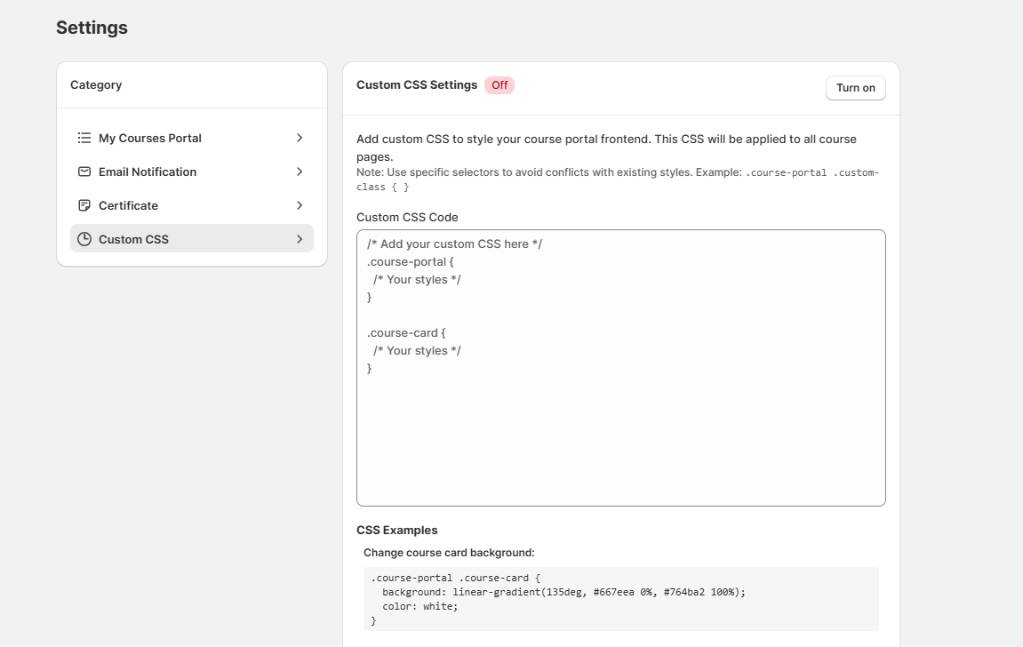
Step 5: Apply Custom Branding (Custom CSS)
- Select Custom CSS from the Category list.
- Insert Style Code: Click inside the Custom CSS Code box to write code styling rules for your frontend portal.
- Safety Rule: Always nest your structural classes within specific app selectors like .course-portal .your-custom-class { } to keep them from breaking your main store theme layout.
- Activate Custom Theme: Go to the top right and click the Turn on button next to Custom CSS Settings to instantly push your new styles to your active storefront.